💬 ChatKit SDK
Build and customize an embeddable chat experience with ChatKit.
ChatKit is the fastest way to build agentic chat experiences. Whether you are creating an internal knowledge assistant, HR onboarding helper, research companion, shopping or scheduling assistant, troubleshooting bot, financial planner, or customer support agent, ChatKit ships an embeddable, customizable chat UI that handles the UX details for you.
With embeddable UI widgets, customizable prompts, tool calling, file attachments, and chain-of-thought visualization, you can build an AI agent without reinventing the chat interface.
Overview
Embed ChatKit in your frontend, customize the look and feel, and let users connect to backends hosted and extended through XpertAI Agent Builder. A dev server is required.
Getting Started with ChatKit
Embedding ChatKit in Your Frontend
At a high level, setup takes three steps: create an agent workflow hosted on XpertAI servers, configure ChatKit, and add capabilities to craft your chat experience.
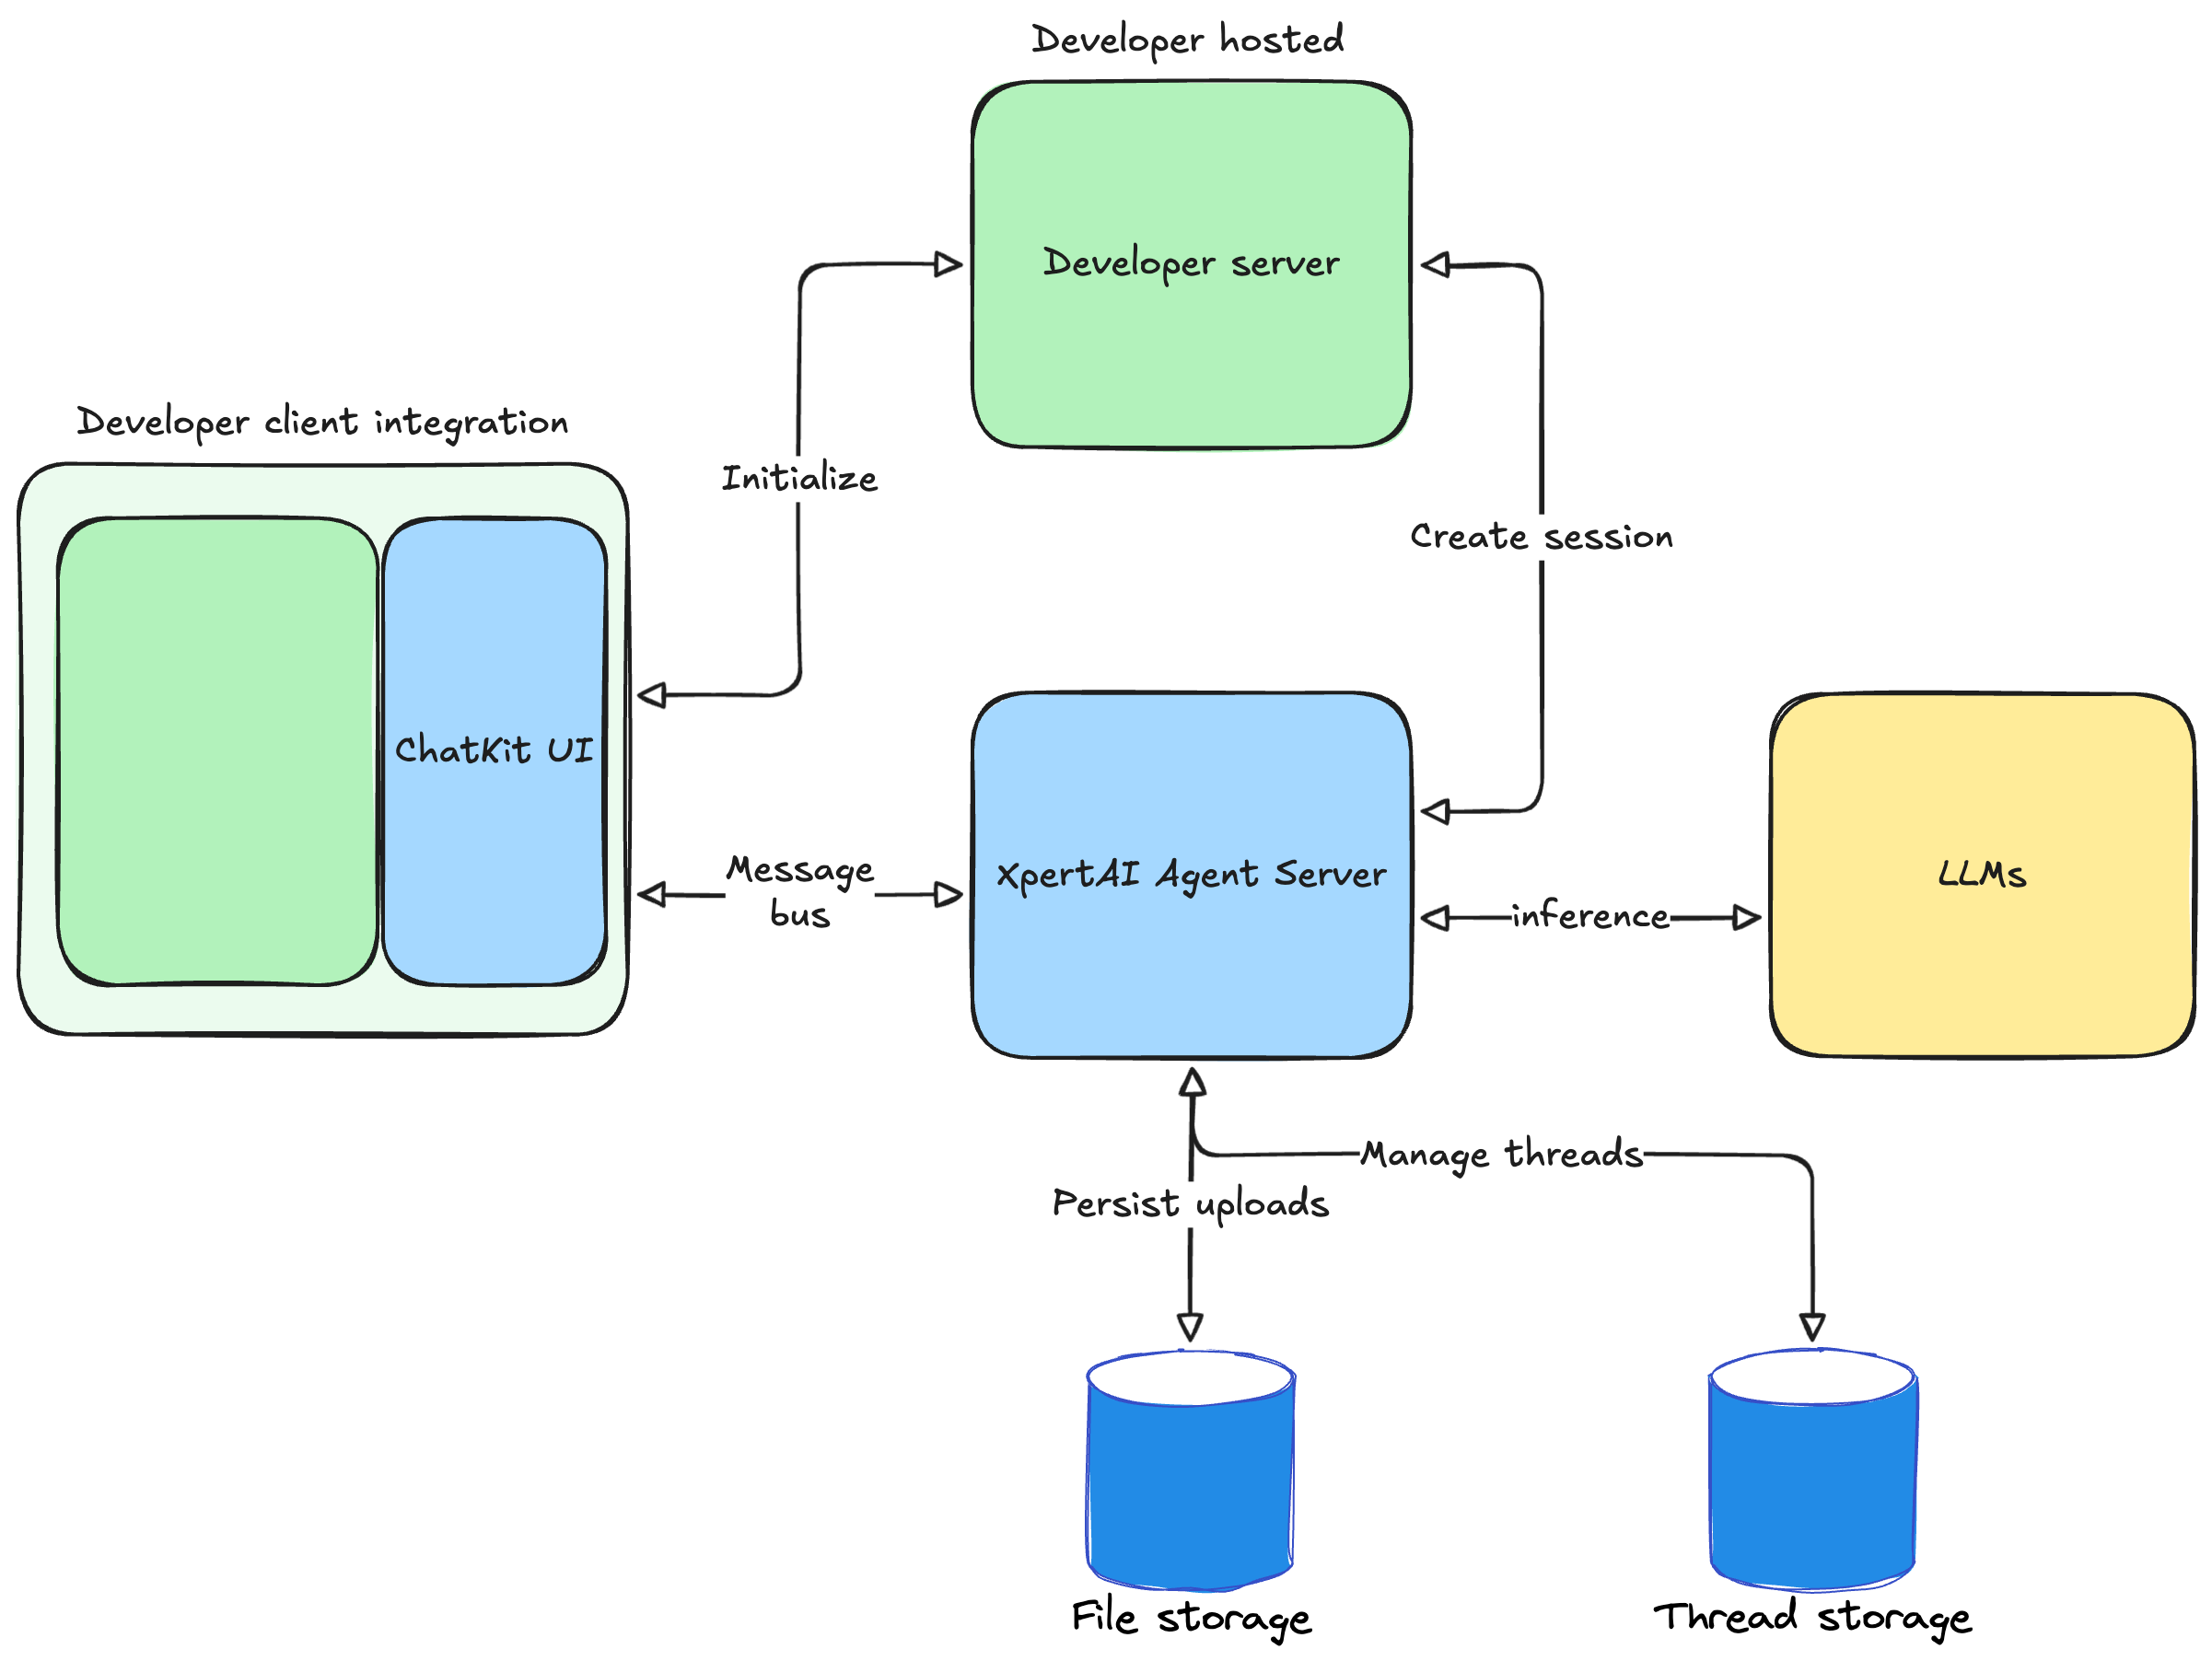
Create an agent workflow
Use the Agent Studio to design a multi-step, multi-agent workflow. You will receive an agent (digital expert) ID. The embedded chat in your frontend points to this workflow as the backend.Set up ChatKit in your product
You need to create a ChatKit session, expose a backend endpoint that takes your agent ID, exchanges a client secret, and add a script to embed ChatKit in your site.2.1. Generate a client API key on your server.
This code starts a FastAPI service whose only job is to create a new ChatKit session via the XpertAI API and return the session client secret to the frontend:
@app.post("/api/create-session")
async def create_session(request: Request) -> JSONResponse:
    # Key vars
    api_key = os.getenv("XPERTAI_API_KEY")
    body = await request.json()

    assistant_id = body.get("assistant_id")          # or resolve from your payload
    user_id = body.get("user_id", "anonymous")       # optional
    api_base = os.getenv("XPERTAI_API_URL", "https://api.xpertai.cn")

    if not api_key or not assistant_id:
        return JSONResponse({"error": "Missing XPERTAI_API_KEY or assistant_id"}, status_code=400)

    async with httpx.AsyncClient(base_url=api_base, timeout=10.0) as client:
        r = await client.post(
            "/v1/chatkit/sessions",
            headers={
                "Authorization": f"Bearer {api_key}",
                "Content-Type": "application/json",
            },
            json={"assistant": {"id": assistant_id}, "user": user_id},
        )

    payload = r.json()
    client_secret = payload.get("client_secret")
    expires_after = payload.get("expires_after")

    if not r.is_success or not client_secret:
        return JSONResponse({"error": payload.get("error", "Failed to create session")}, status_code=502)

    return JSONResponse({"client_secret": client_secret, "expires_after": expires_after})
2.2. Install the ChatKit React bindings in your project:
npm install @xpert-ai/chatkit-react
2.3 Render ChatKit in your UI. This snippet fetches the client secret from your server and mounts a live chat widget connected to your workflow backend.
import { ChatKit, useChatKit } from '@xpert-ai/chatkit-react';

export function MyChat() {
  // Initialize ChatKit
  const chatkit = useChatKit({
    frameUrl: CHATKIT_FRAME_URL || undefined,
    api: {
      apiUrl: XPERT_API_URL,
      xpertId: XPERT_ID,
      getClientSecret: async () => {
        const baseUrl = API_BASE_URL || '';
        const url = `${baseUrl}/api/create-session`;

        const response = await fetch(url, {
          method: 'POST',
          headers: { 'Content-Type': 'application/json' },
          credentials: 'include',
          body: JSON.stringify({ xpertId: XPERT_ID }),
        });

        if (!response.ok) {
          const errorData = await response.json().catch(() => ({}));
          throw new Error(errorData?.error || `HTTP ${response.status}`);
        }

        const data = await response.json();
        if (!data.client_secret) {
          throw new Error('Missing client_secret in response');
        }

        return data.client_secret;
      },
    },
  });

  return (
    <div className="h-full flex flex-col">
      <ChatKit control={chatkit.control} className="flex-1" />
    </div>
  );
Build and iterate
See the theming, widgets, and actions docs to understand how ChatKit works. Explore these resources to test chat behavior, iterate on prompts, and add widgets and tools.